Install the Brillo operating system on the DragonBoard 410c development board
Google proposed Project IoT (Internet Of Things), the Internet of Things program, and released the Brillo operating system. Brillo is an underlying operating system for the Internet of Things. It is derived from Android, is a refinement of the underlying Android, got all the support of Android, such as Bluetooth, Wifi and other technologies, and the energy consumption is very low, the security is very high, any device manufacturer can use it directly, is a Full end-to-end application.
First, the Brillo code downloadRepo init -u https://android.googlesource.com/brillo/manifest -b master
Second, the compilation environmentUbuntu 14.04
Install the following:
Sudo apt-get install Git-core gnupg flex bison gperf build-essenTIal \
Zip curl zlib1g-dev gcc-mulTIlib g++-mulTIlib libc6-dev-i386 \
Lib32ncurses5-dev x11proto-core-dev libx11-dev lib32z-dev ccache \
Libgl1-mesa-dev libxml2-uTIls xsltproc unzip openjdk-7-jdk Python-networkx
Third, compile and burnDownload dragonboard410c BSP package
Wget https://developer.qualcomm.com/qfile/29541/dragonboard410c_brillo-v1.1.tar.gz
Extract to the corresponding directory
$ tar zxvf dragonboard410c_brillo-v1.1.tar.gz
$ mkdir -p vendor/bsp/qcom/device/dragonboard
$ cp -a dragonboard410c_brillo-v1.1/linux_410c_board_support_package_LA.BR.1.2.4_rb1.10 vendor/bsp/qcom/device/dragonboard/
$cp -a dragonboard410c_brillo-v1.1/qcom_410c_non-hlos_binaries_A8016BAAAAGLYD2131.1 vendor/bsp/qcom/device/dragonboard/

Compile
$ source build/envsetup.sh
$ lunch dragonboard-eng
$ make -j8
Burn
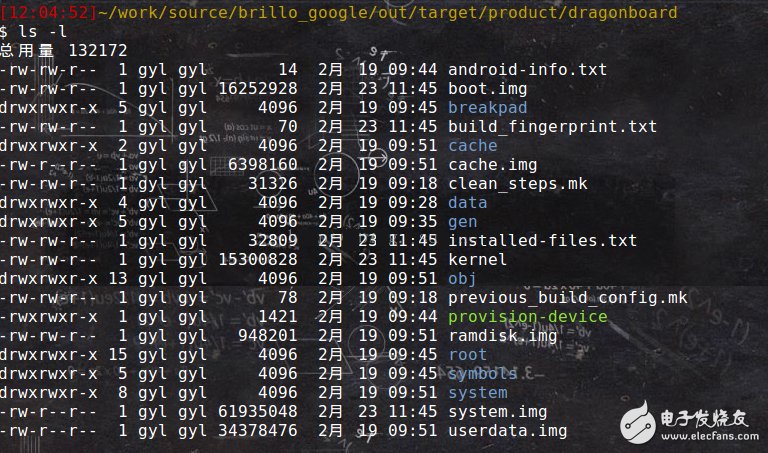
Execute the script out/target/product/dragonboard/provision-device(device/qcom/dragonboard) to complete the burning.
Fourth, the system startsAfter the Brillo system is started, there is no interface display. You can view the log through the serial port or usb.
The serial port connection method is as follows:
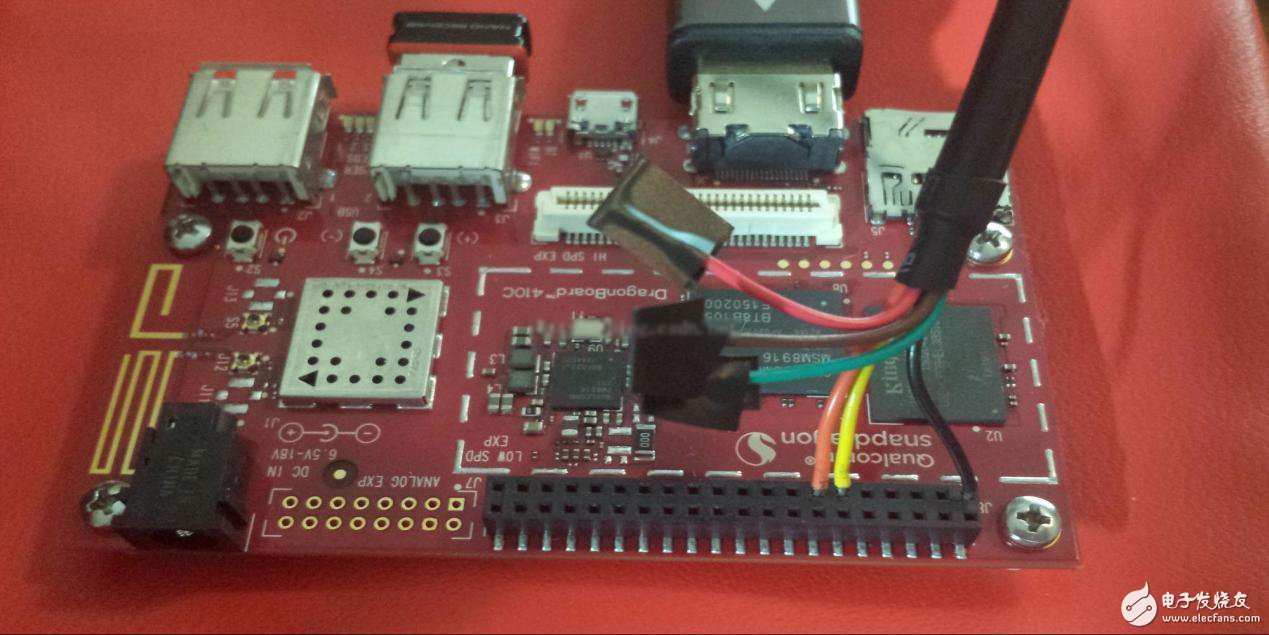
The serial port baud rate is set to 115200 8N1.
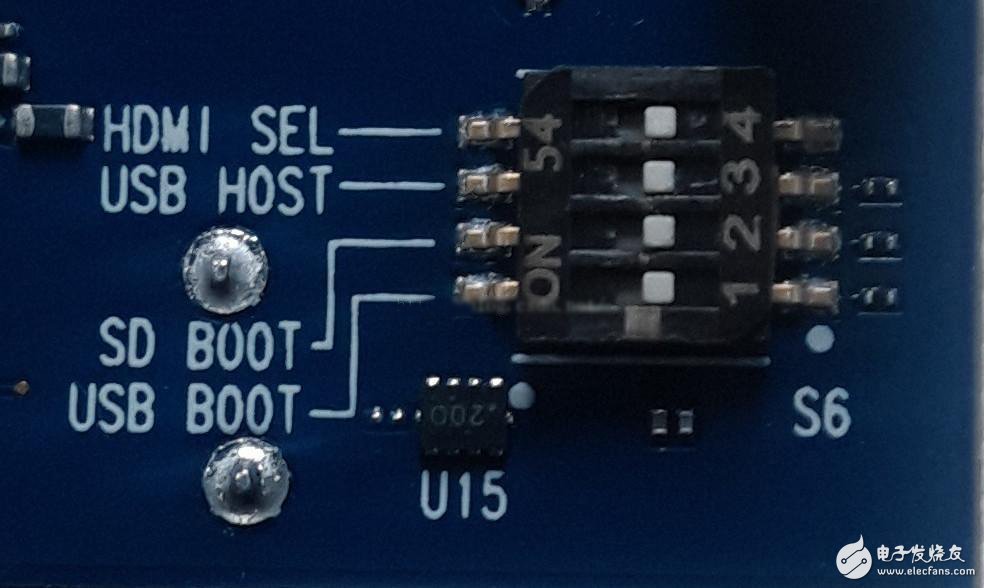
USB connection, connected to the device through the adb command; when the device acts as the device, the DIP switch is dialed to the device, as shown below:
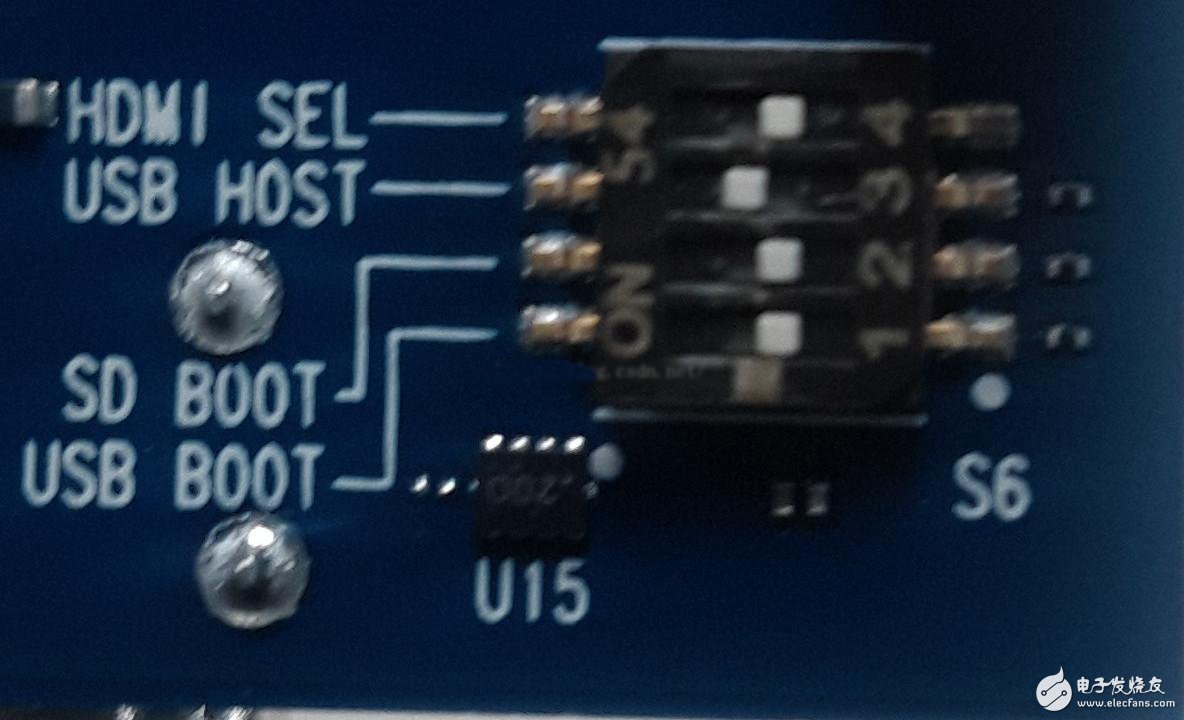
When acting as a host, the DIP switch is dialed to the host, as shown below:
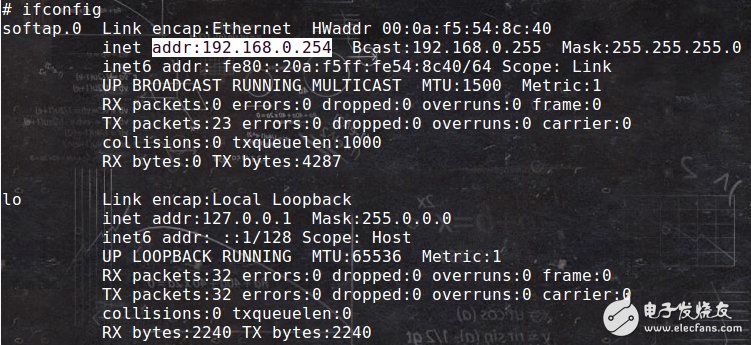
After the system is started, wifi defaults to AP mode. You can see ip through the ifconfig command.
It can be searched on other devices, as shown below:

After connecting, you can test by ping command.
USB 2.0 Printer Cable,USB 2.0 Cable,USB 2.0 Harness,USB Extension Cable
Dong guan Sum Wai Electronic Co,. Ltd. , https://www.sw-cables.com